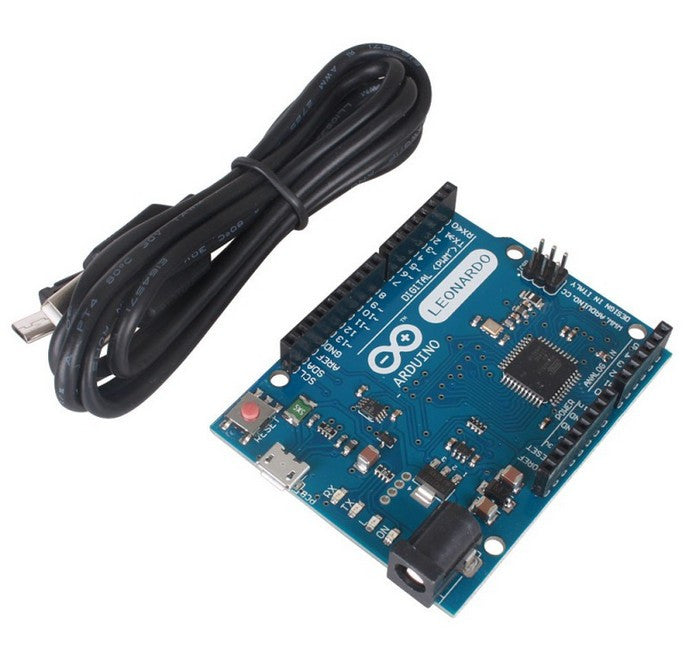
Arduino Leonardo R3 / ATmega32U4 Board + Micro-USB
Description:
The Arduino Leonardo USB board is developed on the basis of AVR ATmega32U4 micro-controller running at 5V/16MHz. The Atmega is pre-programmed with the Arduino boot-loader that allows you to upload code to it via USB using the open-source Arduino development environment.
The Leonardo differs from all preceding Arduino boards that the ATmega32U4 has built-in USB communication, eliminating the need for a secondary processor. While this board allows the Leonardo to appear to a connected computer as a mouse and keyboard in addition to a virtual (CDC) serial / COM port; it also has other implications for the behavior of the board — particularly reset behavior compared to earlier Arduino boards. It also means that there are now separate Serial and Serial1 classes for the virtual serial driver and the hardware serial port, respectively. This also has an effect on the capabilities and assignments of some pins, e.g. SPI and TWI.
The ATmega32U4 allows for serial (CDC) communication over USB and appears as a virtual com port to software on the computer. The chip also acts as a full-speed USB 2.0 device, using standard USB COM drivers. It requires no drivers to be installed for Linux or Mac (for Windows a .inf file is included with the Arduino IDE software).
The Arduino Leonardo board has 20 digital input/output pins (7 can be used as PWM outputs and 12 as analog inputs) available via female headers. The female sockets accept standard square pin headers.
This ATmega board also features a 16 MHz crystal, a power jack (7V to 12V DC), a 2×3-pin AVR In-System Programming (ISP) header, and a reset button. It contains everything needed to support the ATmega micro-controller; simply connect it to a computer with a micro-USB cable or power it with an optional AC-to-DC adapter or battery to get started.
This board is R3, making it compatible with newer Arduino shields that use additional pins. Arduino R3 adds SDA and SCL pins near the AREF pin, and two other new pins placed near the RESET pin. One is called IOREF, which allows R3 shields to adapt to the voltage provided from the board. The other new pin is not connected; it is reserved for future purposes. Arduino R3 boards are still compatible with legacy Arduino shields.
Installing drivers for the Arduino Leonardo under Windows 7 or XP:
Plug in your board and wait for Windows to begin its driver installation process. If the installer does not launch automatically, Navigate to the Windows Device Manager (Start→Control Panel→Hardware) and find the Arduino Leonardo listing. Right-click and choose Update driver.
If prompted to search for drivers online, choose "No, not this time". And click Next.
When asked to install automatically or from a specific location, select "Install from a list or specific location" and click Next.
Choose "Search for the best driver in these locations" and check the box "Include this location in the search". Click the Browse button and navigate to your Arduino 1.0.1 or later installation. Select the drivers folder and click OK.
Now just click Next, then Continue Anyway when Windows complains about the drivers not passing Windows Logo testing. After a moment, it will inform you that installation is complete. Click Finish.
